750,000+ wereldwijd verkochte lakstiftsets
DHLUPSFedEx

Professionele reparatie · thuis

Zo breng je je lakstift aan

Bedankt dat je voor Color N Drive hebt gekozen — een op maat gemengde kleur waarmee je thuis een professioneel ogende reparatie op je MAZDA maakt, met snelle droging en een perfecte fabrieksmatch. Volg de vier stappen hieronder.

In 4 stappen bijwerken

01

Reinigen

Bereid de steenslag voor met Correct'N'Clear. Het oppervlak moet schoon en droog zijn.

02

Bijwerken

Breng je op kleur gemengde lak in dunne laagjes in de beschadiging aan.

03

Afschrapen

Trek het kaartje vlak over om het teveel te verwijderen — de lak blijft in de kras zitten.

04

Afwerken

Veeg het resterende teveel weg met Correct'N'Clear en polijst dan voor een naadloze overgang.

Handleiding · 11 talen

De volledige handleiding, in jouw taal

Kies je taal om de volledige stap-voor-stap-handleiding te lezen, of download de printbare pdf om bij je set te bewaren.

English handleidingvoorbeeldVolledige PDF openen

🇬🇧 English · PDF

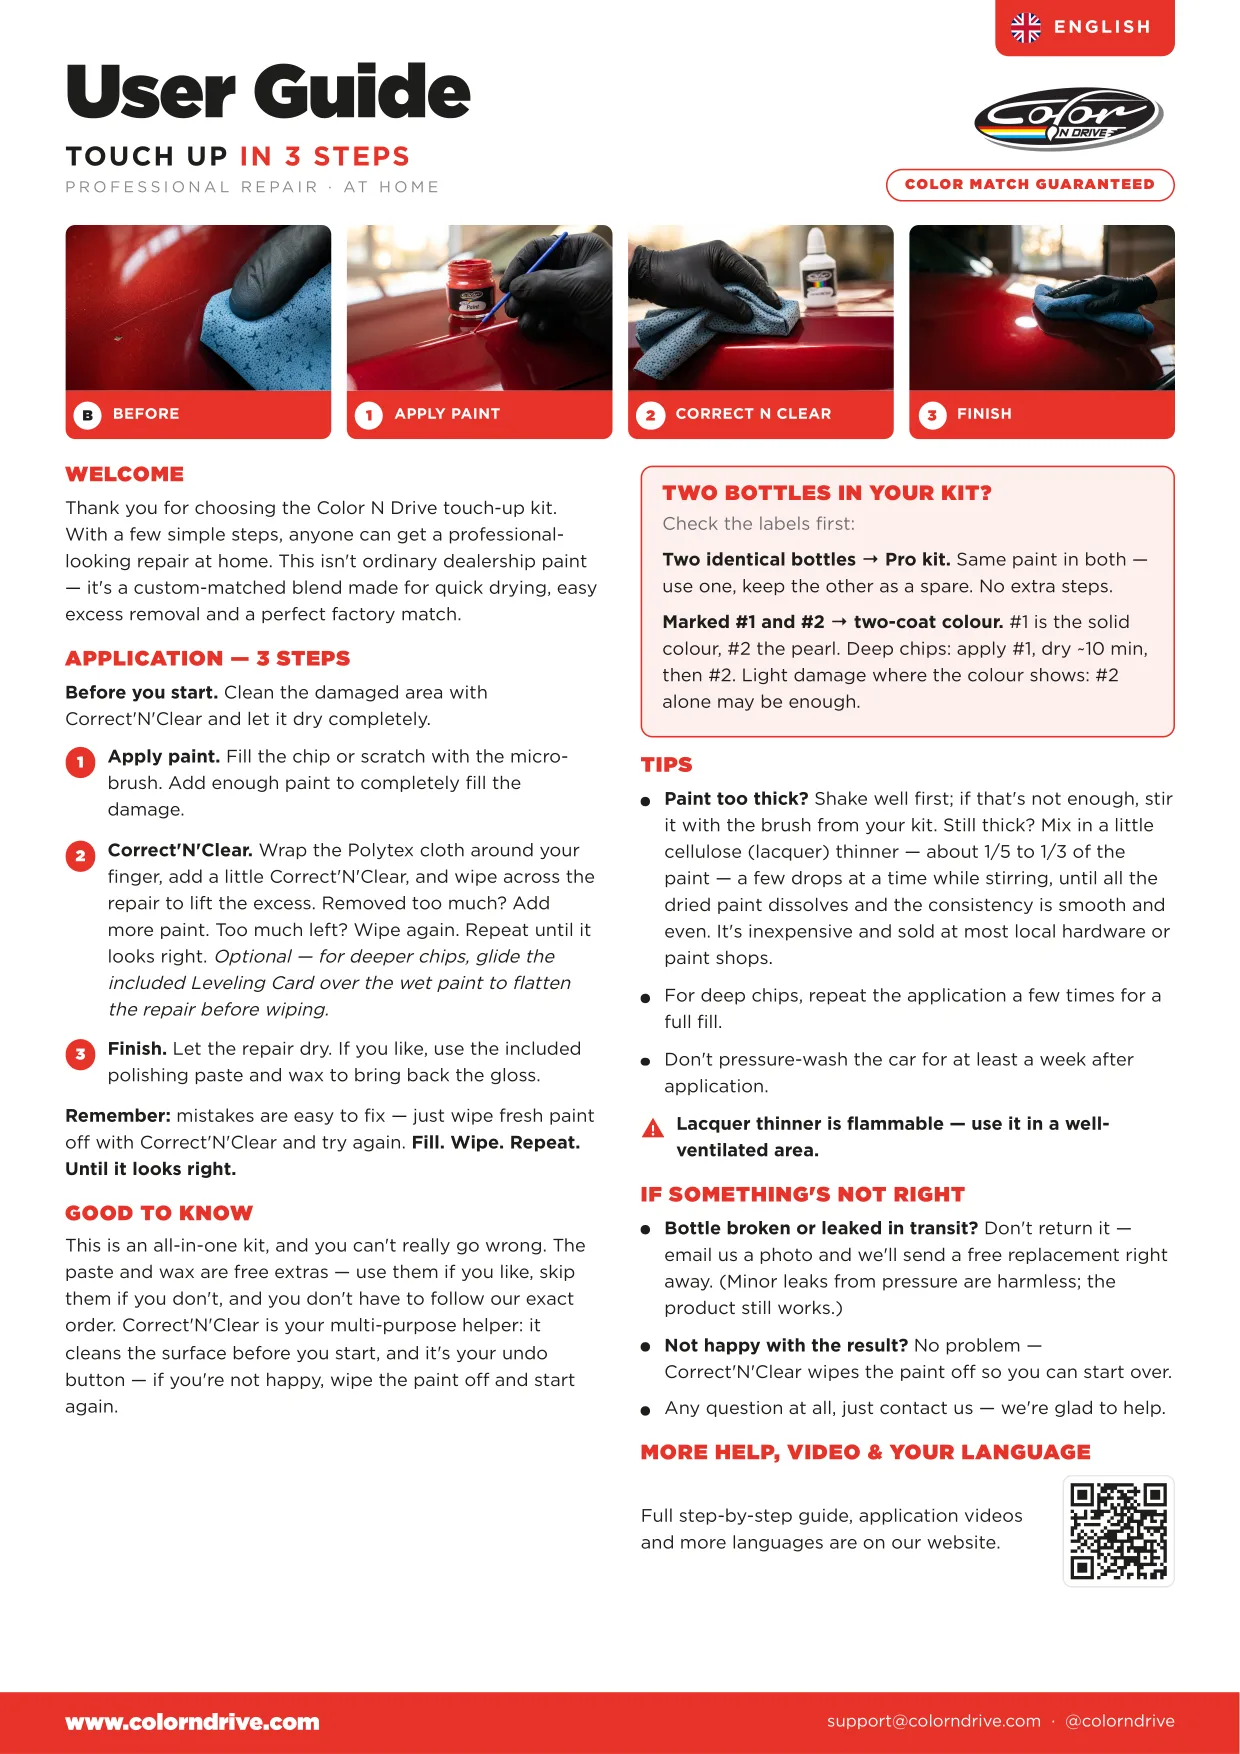
WELCOME

Thank you for choosing the Color N Drive touch-up kit. With a few simple steps, anyone can get a professionallooking repair at home. This isn't ordinary dealership paint — it's a custom-matched blend made for quick drying, easy excess removal and a perfect factory match.

APPLICATION — 3 STEPS

Before you start. Clean the damaged area with Correct'N'Clear and let it dry completely.

Apply paint. Fill the chip or scratch with the microbrush. Add enough paint to completely fill the damage. Correct'N'Clear. Wrap the Polytex cloth around your finger, add a little Correct'N'Clear, and wipe across the repair to lift the excess. Removed too much? Add more paint. Too much left? Wipe again. Repeat until it looks right. Optional — for deeper chips, glide the included Leveling Card over the wet paint to flatten the repair before wiping. Finish. Let the repair dry. If you like, use the included polishing paste and wax to bring back the gloss.

Remember: mistakes are easy to fix — just wipe fresh paint off with Correct'N'Clear and try again. Fill. Wipe. Repeat. Until it looks right.

TWO BOTTLES IN YOUR KIT?

Check the labels first: Two identical bottles → Pro kit. Same paint in both — use one, keep the other as a spare. No extra steps. Marked #1 and #2 → two-coat colour. #1 is the solid colour, #2 the pearl. Deep chips: apply #1, dry ~10 min, then #2. Light damage where the colour shows: #2 alone may be enough.

TIPS

Paint too thick? Shake well first; if that's not enough, stir it with the brush from your kit. Still thick? Mix in a little cellulose (lacquer) thinner — about 1/5 to 1/3 of the paint — a few drops at a time while stirring, until all the dried paint dissolves and the consistency is smooth and even. It's inexpensive and sold at most local hardware or paint shops. For deep chips, repeat the application a few times for a full fill. Don't pressure-wash the car for at least a week after application. Lacquer thinner is flammable — use it in a wellventilated area.

IF SOMETHING'S NOT RIGHT

GOOD TO KNOW

This is an all-in-one kit, and you can't really go wrong. The paste and wax are free extras — use them if you like, skip them if you don't, and you don't have to follow our exact order. Correct'N'Clear is your multi-purpose helper: it cleans the surface before you start, and it's your undo button — if you're not happy, wipe the paint off and start again.

Bottle broken or leaked in transit? Don't return it — email us a photo and we'll send a free replacement right away. (Minor leaks from pressure are harmless; the product still works.) Not happy with the result? No problem — Correct'N'Clear wipes the paint off so you can start over. Any question at all, just contact us — we're glad to help.

MORE HELP, VIDEO & YOUR LANGUAGE

Full step-by-step guide, application videos and more languages are on our website.

Aanbrengvideo

Bekijk de volledige aanbrengvideo

Zie precies hoe de stappen reinigen, aanbrengen, afschrapen en afwerken samenkomen voor een glad, op kleur gemaakt resultaat — van begin tot eind in een paar minuten.

Correct'N'Clear — je vangnet

Tenzij je auto nieuw is, matcht de kleur in het begin misschien niet perfect — fabriekslak verbleekt na verloop van tijd. Bouw de lak op tot de tint klopt; Correct'N'Clear verwijdert de bijwerklaag altijd veilig, zodat je met een gerust hart en zonder risico kunt werken.

Stappen voor het aanbrengen

  1. 1

    Reinigen

    Verwijder al het vuil, was en polish met Correct'N'Clear en laat het daarna drogen.

  2. 2

    Aanbrengen

    Breng de lak met het penseel in dunne laagjes in de steenslag aan — bouw geleidelijk op, overspoel hem niet.

  3. 3

    Afschrapen & egaliseren

    Trek het Color N Drive-kaartje in natte toestand vlak als een spatel over om het teveel af te heffen; de lak blijft stevig in de kras zitten. Geen kaartje? Elk stevig visitekaartje werkt.

  4. 4

    Afvegen

    Wrijf zodra het droog is een beetje Correct'N'Clear over de plek met het doekje. Druk niet hard — laat de oplossing zijn werk doen. Herhaal tot alleen de gevulde kras overblijft.

Cosmetische afwerking (optioneel)

Pasta
Zonder schuurmiddel; verzacht de kleurovergang rond de reparatie.
Was
Poets het hele paneel voor de meest gelijkmatige, egale glans.

Tips

  • Schud het flesje goed voor elk gebruik om klodders te voorkomen.
  • Diepe steenslag: herhaal het aanbrengen een paar keer voor een volledige vulling.
  • Vers gespoten paneel? Laat het eerst ~1 maand uitharden.
  • Geen hogedrukreiniging gedurende minstens 1 week na het aanbrengen.

Twee identieke flesjes → Pro-set

In beide dezelfde lak — gebruik de één, houd de ander als reserve. Geen extra stappen.

Gemarkeerd #1 & #2 → tweelaagse kleur

#1 is de dekkende kleur, #2 de parelmoer. Diepe steenslag: breng #1 aan, ~10 min drogen, dan #2. Lichte schade waar de kleur doorschemert: #2 alleen kan volstaan.

Heb je nog een vraag over het aanbrengen van je lak?